


Pivoting to real-time updates over the unpredictable climate has become an important part of our daily lives. Having a weather application acts as a saviour, you can just look up the weather forecast news with the time durations and climate changes occurring anywhere in the world by simply tapping on the mobile screen.
While smartphones come with already installed weather applications, giving a unique touch to your app development idea can cause no harm. According to a recent YouGov poll conducted in America, it was observed that only 53% of the people used weather apps.
In fact, the probability of your in-built mobile weather apps predicting the right climate circumstances is 20-70 percent true.
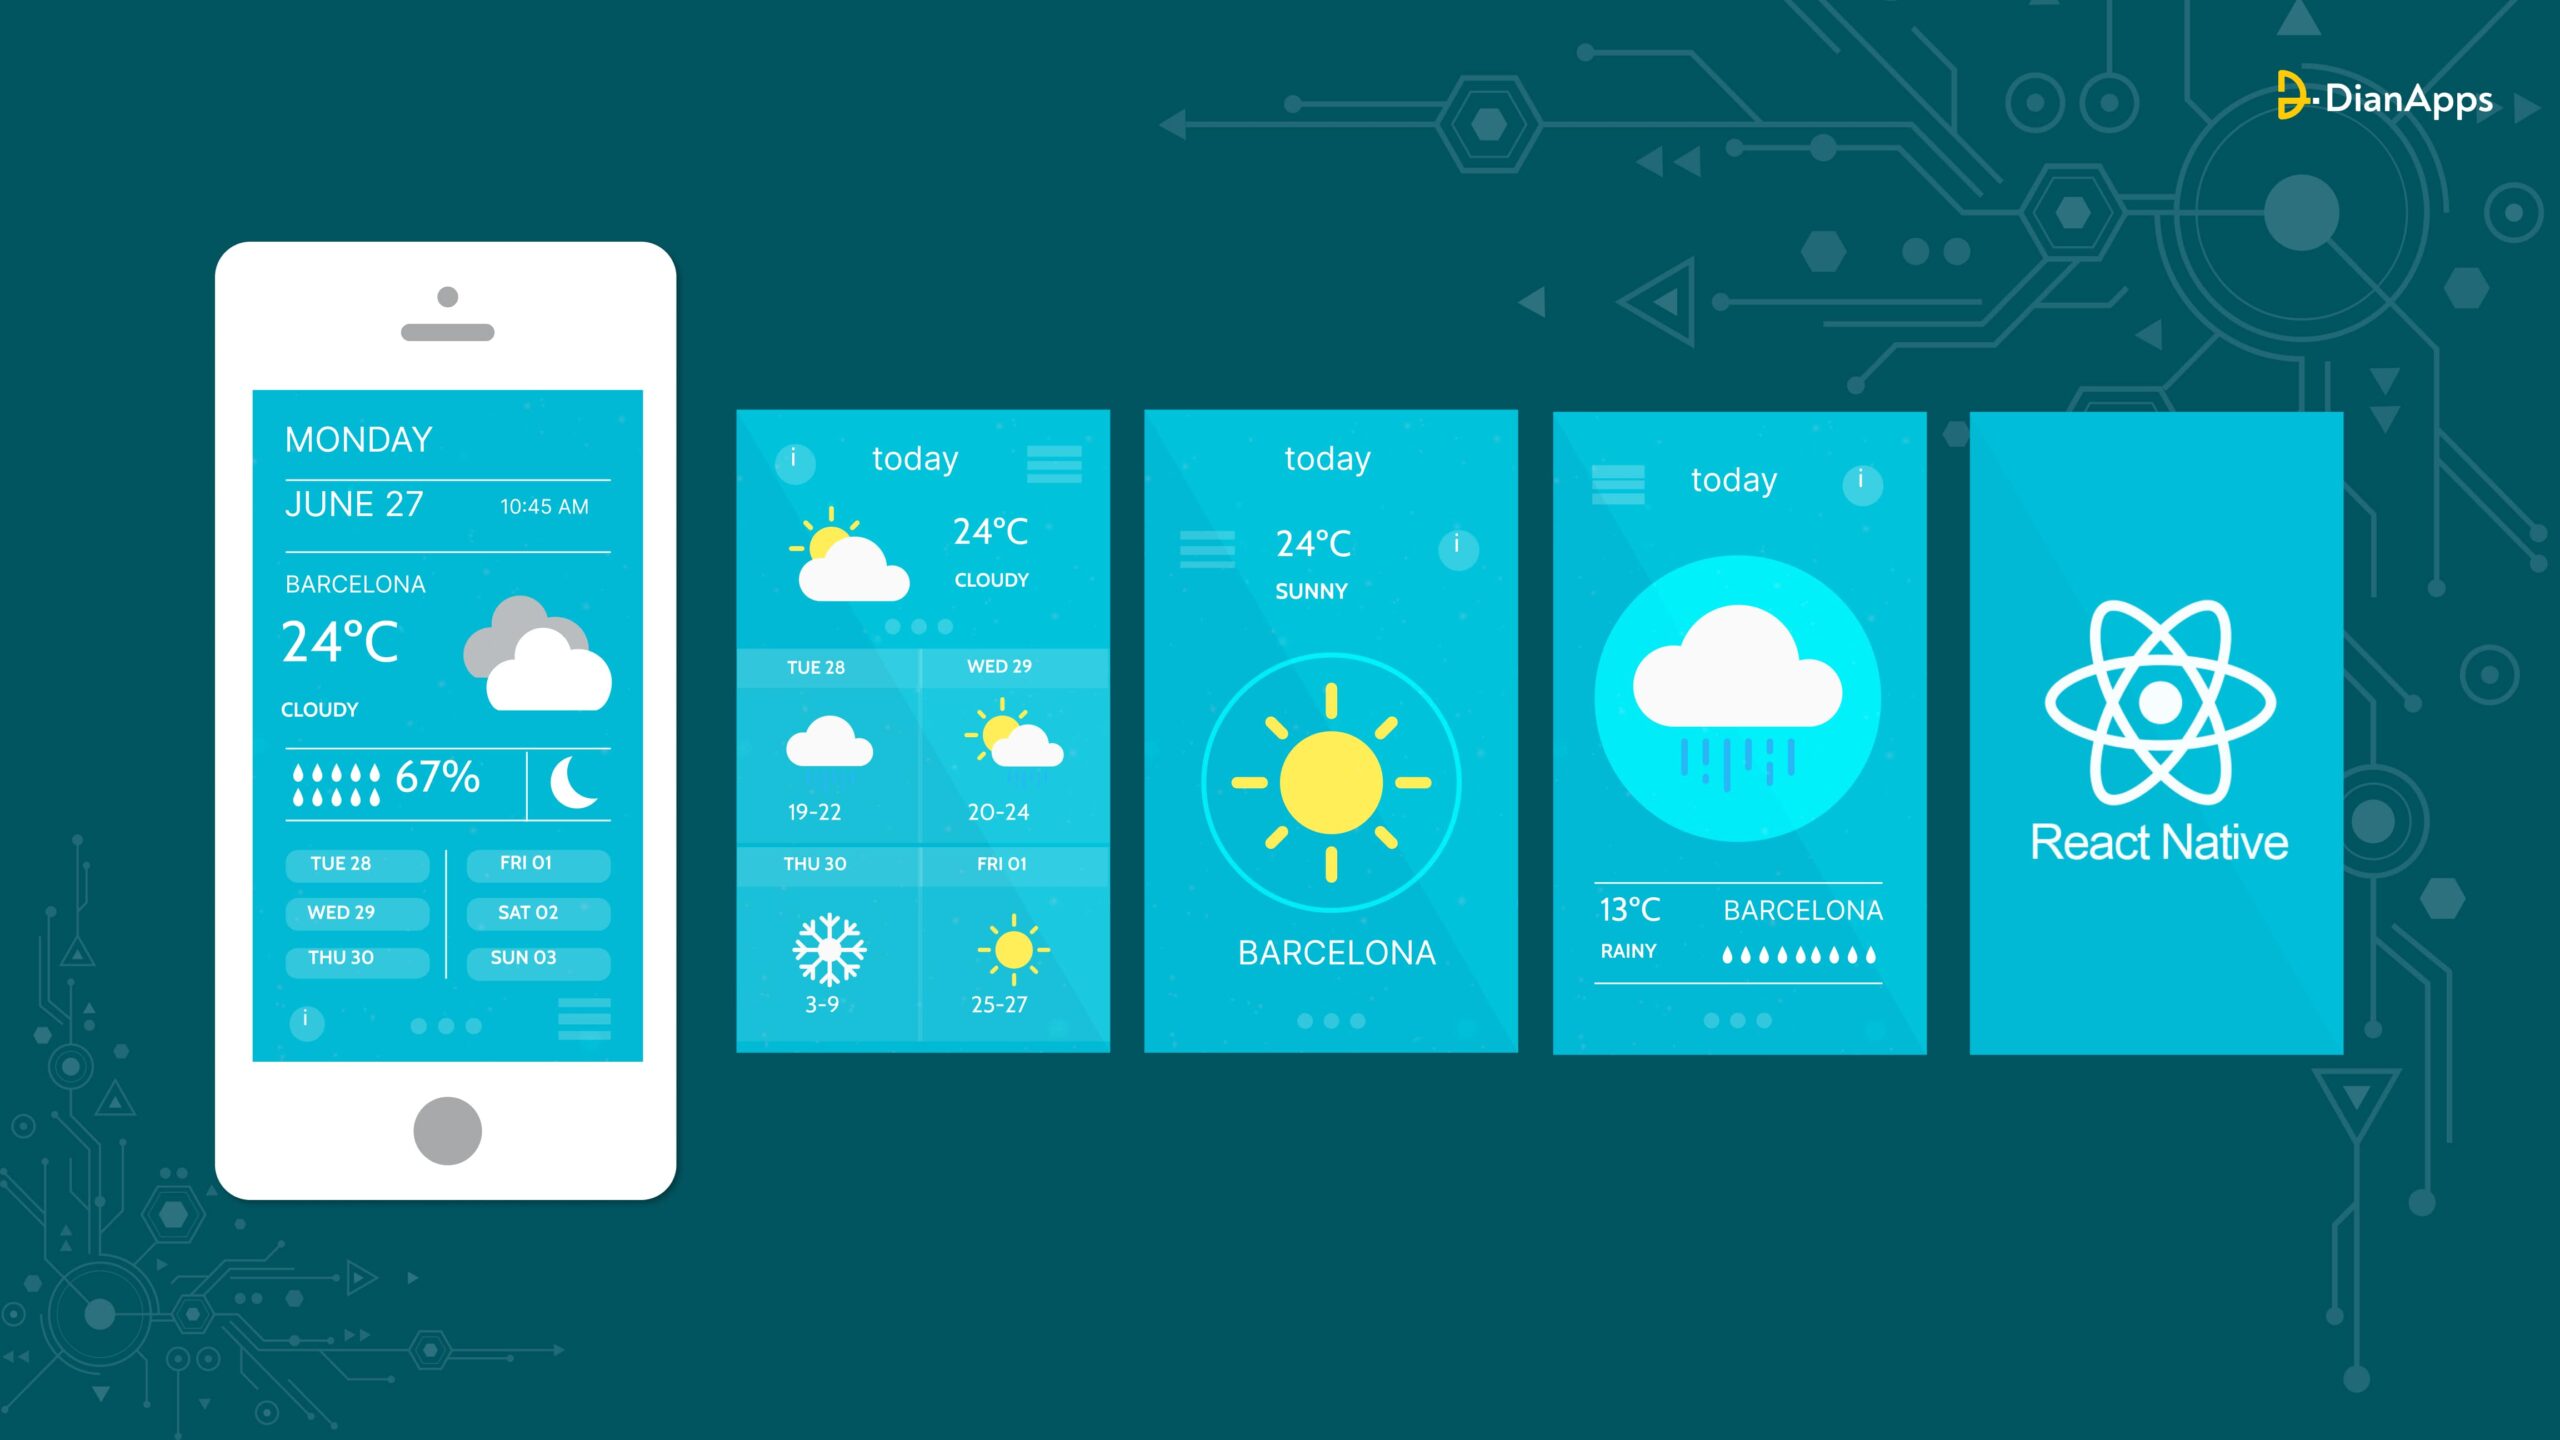
Therefore, you must not miss a chance to give users something extraordinary. In this blog, we are going to use React Native app development as our core framework to create highly advanced weather applications for your business.
Why React Native is a good choice? It can provide scalability, compatibility, and usability to your app. To add more, React Native app development is an open-source cross-platform app development toolkit that requires less coding and gives highly interactive apps.
In this blog post, we’ll take you through creating weather apps using React Native with the help of relevant code snippets and images along the way.
Prerequisites
- Basics of Javascript
- React Knowledge Base
- React Native Basics
- Node.js and npm
- Expo XDE
- A Basic idea of API calls
Steps To Create a Weather App Using React Native
To start building your first-ever weather application. We’ll be using Android OS. However, if you want to create an iOS Weather application, you can use Xcode.
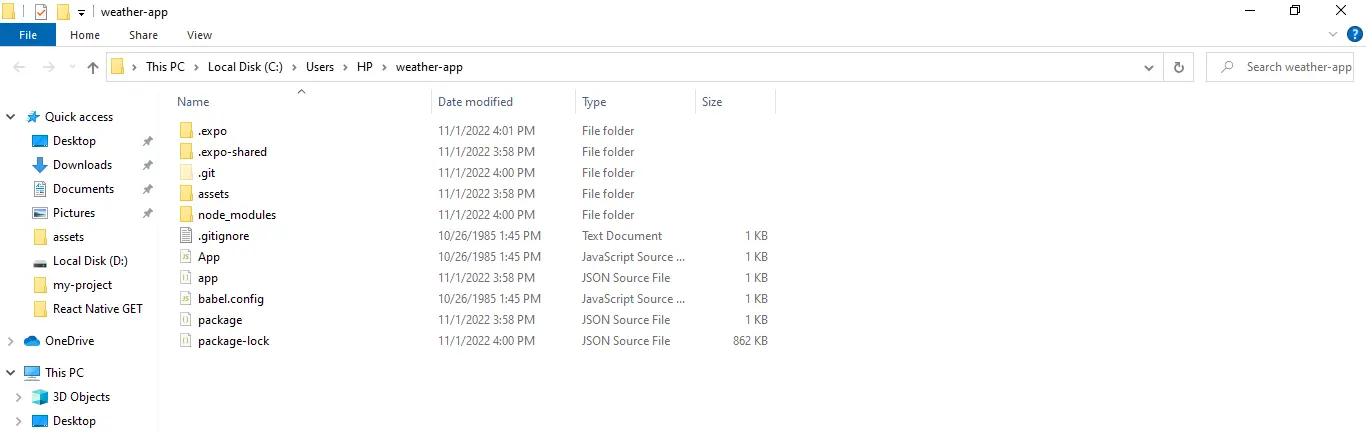
Let’s create a simple React Native app using Expo and name the project as ‘weather app’. We will be using npx-create-expo-app weather-app to create the project. Here look at the reference mentioned in the Local C drive of our desktop file image.
Now, let’s change our loading screen to add different images and components to the root directory of the React Native weather application.
Developing The Loading Screen
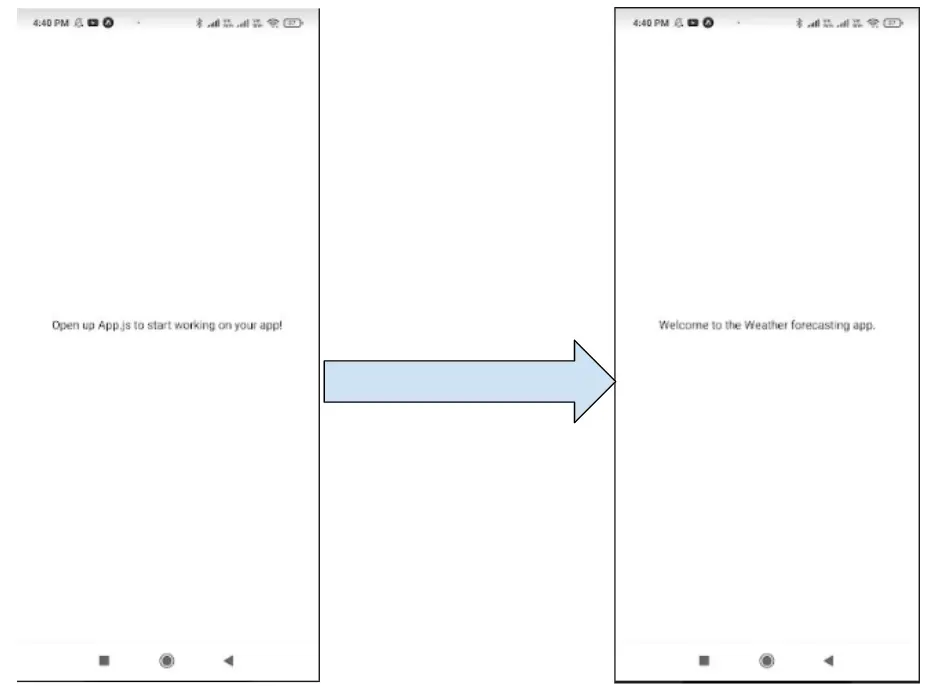
The loading screen will now read “Welcome to the Weather forecasting app.” instead of “Open up App.js to start working on your app!” in this stage.
To do this, open the app’s app.js file and modify the <Text>Open App.js to begin developing your app!\/Text>to <Text>Greetings from the weather prediction app.</Text> Take a look at picture 2.
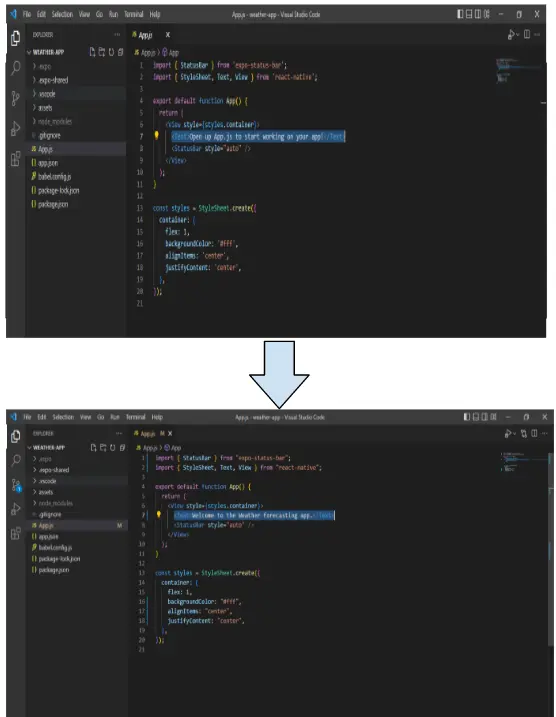
Following this, refer the third image to change the output.
Use the isLoading State
In this stage, I declare the local state as true or false using the isLoading boolean state. You can demonstrate if the data that the application is attempting to fetch is loading by practising with isLoading. If data loading is occurring, you can set it to “true,” and if not, you can set it to “false.”
In this project, if the isLoading state is false, the words “Welcome to the Weather forecasting app.” will appear on the app screen. Take a look at the following bit of code for this. Please see image 4 for the result.
|
1 2 3 4 5 6 7 8 9 10 11 12 13 14 15 16 17 18 19 20 21 22 23 24 25 26 27 28 29 |
export default class App extends React.Component { state = { isLoading: false }; render() { const { isLoading } = this.state; return ( <View style={styles.container}> {isLoading ? null : ( <View> <Text>Welcome to the Weather forecasting app.</Text> </View> )} </View> ); |

The primary purpose of using the isLoading state is to provide weather-based data once the API request has been established successfully, rather than the phrase “Welcome to the Weather forecasting app.”
For now, we’ve designed the code so that while the state is Loading is “true,” the program will display the text “Please wait while it is collecting the weather-based data.” Examining the code sample that follows. View image 5 to see the result.
|
1 2 3 4 5 6 7 8 9 10 11 12 13 14 15 16 17 18 19 20 21 22 23 |
export default class App extends React.Component { state = { isLoading: true }; render() { const { isLoading } = this.state; return ( <View style={styles.container}> {isLoading ? ( <Text>Please wait, while it is collecting the weather-based data.</Text> ) : ( <View> |

You must set the isLoading property’s state to false when the API has retrieved the data Including a weather component.
Read how to integrate APIs in React Native for enhanced functionalities.
This section will cover how to create the first screen title and body design for your weather app.
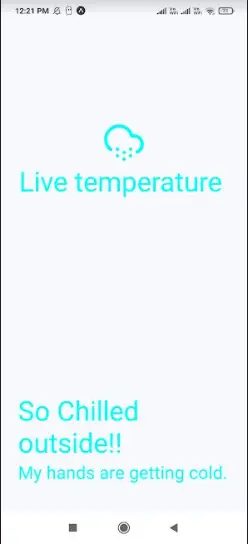
The temperature and a little emblem will make up the title. The remaining portion of the screen will display text about the weather.
You must make a “Component” folder in your app’s root directory in order to accomplish this. Next, make a new file in the Component folder called “Weather.js.” Here, you will add several weather components and develop the first screen’s code basis.
Following the main container’s incorporation, I will designate two containers: titleBody and containercontainer in the primary container.
Additionally, I’ll utilize Feather from the @expo/vector-icons directory to add a snowflake icon to the app’s home screen. This is among the advantages that the Expo tool offers. It makes it easy to add several libraries to your project’s root directory. we’ve used the vector-icons library in this instance.
See the output in image 6 and the code snippet below.
|
1 2 3 4 5 6 7 8 9 10 11 12 13 14 15 16 17 18 19 20 21 22 23 24 25 26 27 28 29 30 31 32 33 34 35 36 37 38 39 40 41 42 43 44 45 46 47 48 49 50 51 52 53 54 55 56 57 58 59 60 61 62 63 64 65 66 67 68 69 70 71 72 73 74 75 76 77 78 79 80 81 82 83 84 85 86 87 88 89 90 91 92 93 94 95 96 97 98 |
import React from "react"; import { View, Text, StyleSheet } from "react-native"; import { Feather } from "@expo/vector-icons"; const Weather = () => { return ( <View style={styles.weatherContainer}> <View style={styles.titleContainer}> <Feather name="cloud-snow" size={58} color="#00ffff" /> <Text style={styles.tempText}>Live temperature </Text> </View> <View style={styles.bodyContainer}> <Text style={styles.title}>So Chilled outside!!</Text> <Text style={styles.subtitle}>My hands are getting cold.</Text> </View> </View> ); }; const styles = StyleSheet.create({ weatherContainer: { flex: 1, backgroundColor: "#f8f8ff", }, titleContainer: { flex: 2, alignItems: "center", justifyContent: "center", }, tempText: { fontSize: 40, color: "#00ffff", }, bodyContainer: { flex: 1, alignItems: "flex-start", justifyContent: "flex-end", paddingLeft: 25, marginBottom: 40, }, title: { fontSize: 40, color: "#00ffff", }, subtitle: { fontSize: 26, color: "#00ffff", }, }); export default Weather; |
Quick Example of UK Weather Forecast Snow App
If you want to create a UK weather forecast snow detection app that assists UK-based population to check the climate or conditions on the road during a high-alert snowing weather. You can follow the similar steps as guided in this blog post. All you have to do is change the app name of your weather forecast business application.
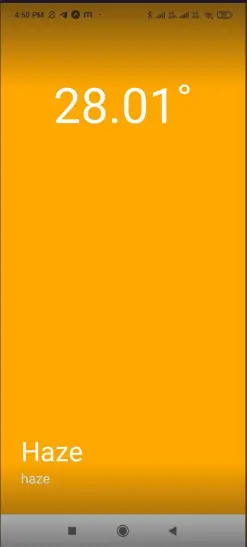
API Calling- Weather-based Data
You can use the following address to retrieve data from the web server:
https://openweathermap.org. You also need a specific API key to access the data from a certain API URL. Therefore, to obtain the “default” key for this, you must log in to this website and visit the API part.
You can utilize the provided weather app code sample to further your understanding by looking at it below. However, to maximize the code efficiency in React Native, review our thoroughly addressed blog.
Please see image 7 for the result.
An Example of the Weather app’s code
|
1 2 3 4 5 6 7 8 9 10 11 12 13 14 15 16 17 18 19 20 21 22 23 24 25 26 27 28 29 30 31 32 33 34 35 36 37 38 39 40 41 42 43 44 45 46 47 48 49 50 51 52 53 54 55 56 57 58 59 60 61 62 63 64 65 66 67 68 69 70 71 72 73 74 75 76 77 78 79 80 81 82 83 84 85 86 87 88 89 90 91 92 93 94 95 96 97 98 99 100 101 102 103 104 105 106 107 108 109 110 111 112 113 114 115 116 117 118 119 120 121 122 123 124 125 126 127 128 129 130 131 132 133 134 135 136 137 138 139 140 141 142 143 144 145 146 147 148 149 150 151 152 153 154 155 156 157 158 159 160 161 162 163 164 165 166 167 168 169 170 171 |
import React, { useState, useEffect } from "react"; import { Platform, Text, View, StyleSheet } from "react-native"; import * as Location from "expo-location"; const API_KEY = "5bd2e0405c5b05e7f1dcda04a58619b5"; export default function App() { const [location, setLocation] = useState(null); const [weatherData, setWeatherData] = useState(null); const [loaded, setLoaded] = useState(true); useEffect(() => { const DataLocation = async () => { let { status } = await Location.requestForegroundPermissionsAsync(); if (status !== "granted") { setErrorMsg("Permission to access location was denied"); return; } let location = await Location.getCurrentPositionAsync({}); setLocation(location); console.log(location, "tanusree"); }; DataLocation(); }, []); async function fectWeatherData(location) { let lat = location.coords.latitude; let long = location.coords.longitude; console.log(lat, long); setLoaded(false); const API = `https://api.openweathermap.org/data/2.5/weather?lat=${lat}&lon=${long}&appid=${API_KEY}&units=metric`; console.log(API); try { const response = await fetch(API); if (response.status == 200) { const data = await response.json(); console.log(data, "12"); setWeatherData(data); } else { setWeatherData(null); } setLoaded(true); } catch (error) { console.log(error); } } useEffect(() => { fectWeatherData(location); console.log(weatherData, "345"); }, [location]); return ( <View style={styles.weatherContainer}> <View style={styles.headerContainer}> <Text style={styles.tempText}> {weatherData && weatherData.main.temp}˚ </Text> </View> <View style={{ flex: 1, justifyContent: "flex-end", marginLeft: 30, marginBottom: 40, }} > <Text style={{ fontSize: 40, color: "#FFFFFF" }}> {weatherData && weatherData.weather[0].main} </Text> <Text style={{ fontSize: 20, color: "#FFFFFF" }}> {weatherData && weatherData.weather[0].description} </Text> </View> </View> ); } const styles = StyleSheet.create({ weatherContainer: { flex: 1, backgroundColor: "orange", }, headerContainer: { flexDirection: "row", marginTop: 100, justifyContent: "space-around", }, tempText: { fontSize: 72, color: "#FFFFFF", }, }); |
Exciting Features You Can Include In Your Weather App In 2024
1. Smart Notifications Based on Current Weather Conditions
This essential feature, known as smart notifications or push notifications in React Native based on the current weather forecast, is necessary for the Weather Forecast app for iOS and Android to function properly. This feature continually alerts users of your app to the need to pack an umbrella in the event of impending rain and to shield themselves from strong UV radiation and heat stroke. You can send app users notifications with the most recent weather conditions. Thus, it is essential to take into account in-app notifications when creating a weather app similar to AccuWeather.
Technology Used: TSMessages to Create This Feature
A library called TSMessages offers a simple class for displaying alerts at the top of the screen. The library additionally permits the creation of eye-catching notifications and alerts.
Image Source: AccuWeather
2. Hyper-Local Forecast
The hyper-local forecast, which uses the user’s present location to anticipate rain, storms, and weather changes with a per-minute accuracy, is the next essential feature that you must include in your weather app before launching it.
Our React Native app developers use the Dark Sky API to obtain the same data in order to construct this functionality.
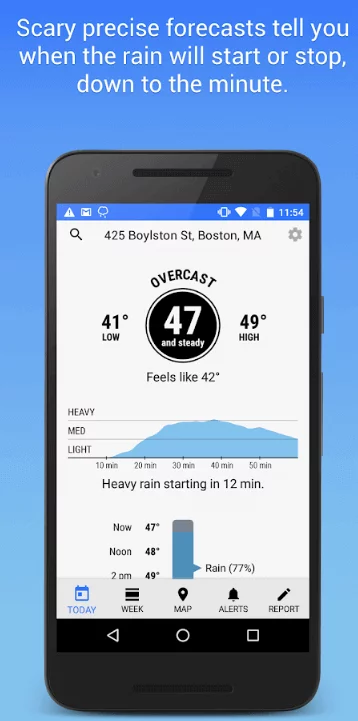
Image Source: AccuWeather
3. Weather Showcasing Appealing Map View
It’s essential to provide your weather forecasting app consumers with beautiful maps that let them examine previous and future weather conditions in addition to forecasting the current conditions. This kind of functionality is essential to take into account since it enables app users to view the entire historical and projected weather data. If you’re going to make a weather app similar to Dark Sky, this kind of functionality is something to think about.
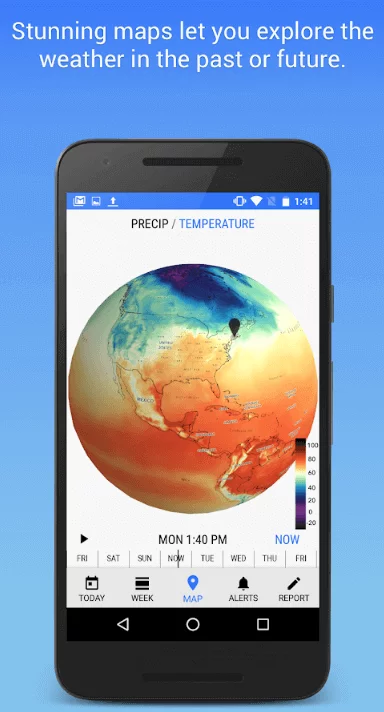
Image Source: AccuWeather
That’s a wrap on building an exclusive weather app using React Native app development services for your business. However, the said code is easy to use and develop, we advise you to get help from an experienced React Native app development company.
Where to Find one? You have to go anywhere. DianApps is a top React Native app development company in the USA, UK, Australia, and Canada. We have a team of highly trained mobile app developers who understand the latitude and longitude of app development. We infusion the best quality technologies that hold a great future while preparing a project strategy that is AI-driven and Industry-proven.
In a nutshell, you get everything your business needs in one single company–DianApps.
Conclusion
This blog is a summary of how to create weather apps in the React Native framework. Note that we have used Expo Go to run the app on a real Android device. Interestingly, developers can also make use of the code snippet to add other small icons as per the weather conditions.
It’s time to implement the codebase to build a weather application yourself. If you have any difficulties, get in touch with DianApps mobile app development experts for free.
Happy coding!


Leave a Comment
Your email address will not be published. Required fields are marked *