


Mobile apps have become an integral part of our lives, providing us with the convenience of accessing information and services on the go. Android, being the most widely used mobile operating system, has a vast market for app developers to showcase their skills and creativity. If you’re interested in developing Android apps from scratch, then this blog post is for you.
In this post, we’ll guide you through the steps of developing Android apps from scratch, starting with setting up your development environment, choosing a programming language, and learning the basics of Android development. We’ll also cover topics like building your first app, testing it, and publishing it to the Google Play Store.
Whether you’re a beginner or an experienced developer, this post will provide you with a roadmap to develop Android apps from scratch. So, buckle up, and let’s dive into the world of Android app development!
Statistics on Android App Development
Here are some statistics on Android app development:
- As of 2021, there are over 3.48 million Android apps available on the Google Play Store.
- In 2020, Android was the most popular mobile operating system worldwide, with a market share of over 70%.
- Kotlin, which became an official programming language for Android development in 2017, has seen rapid growth in adoption. As of 2021, it is the second most popular programming language for Android development after Java.
- According to Statista, the global mobile app revenue is projected to reach $935 billion by 2023, with Android apps contributing a significant portion of this revenue.
- In terms of the most popular app categories, gaming apps are the most downloaded on the Google Play Store, followed by social media and communication apps.
- The average cost of developing an Android app ranges from $25,000 to $150,000, depending on the complexity of the app, the features it offers, and the development company’s location.
These statistics demonstrate the significant impact that Android app development trends have on the mobile industry and the growing demand for mobile apps globally.
Roadmap To Develop Android Apps From Scratch
Building your first-ever Android app from scratch can be an exciting and challenging experience. Here’s a step-by-step guide to help you get started:
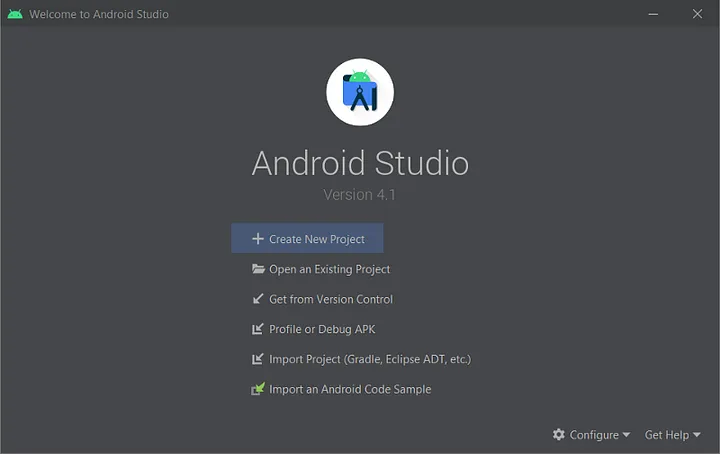
Install Android Studio:
Android Studio is the official Integrated Development Environment (IDE) for Android development. You can download and install it from the official Android developer website.
Set up Android Studio:
After installing Android Studio, you need to set it up by installing the required SDKs and tools. You can follow the setup wizard to install the necessary components.
To set up Android Studio, you need to follow these basic steps:
- Download and install Android Studio from the official website.
- Open Android Studio and follow the setup wizard to install the necessary components and SDKs.
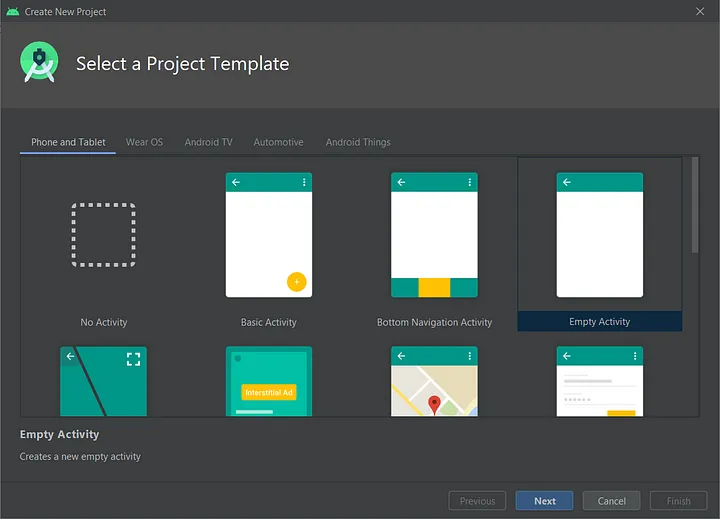
- After the installation is complete, launch Android Studio and select “Start a new Android Studio project” from the main menu.
- Choose a project template and configure the project settings, such as the project name, package name, and location.
- Click “Finish” to create the project.
Once the project is created, you can start developing your Android app by writing code, adding resources, and testing your app on an emulator or physical device. You can also use the Android Studio interface to manage your project, import external libraries, and generate signed APKs for distribution.
Create a new project
Your adventure with Android Studio begins here.
- Open Android Studio and click on “Start a new Android Studio project” on the welcome screen.
- In the “Create New Project” dialog box, enter the following information:
- Application name: The name of your app.
- Company domain: Your company’s domain name.
- Project location: The directory where you want to store your project files.
- Choose the target Android devices and the minimum SDK version that your app will support.
- Select a template for your project, such as “Empty Activity” or “Basic Activity”.
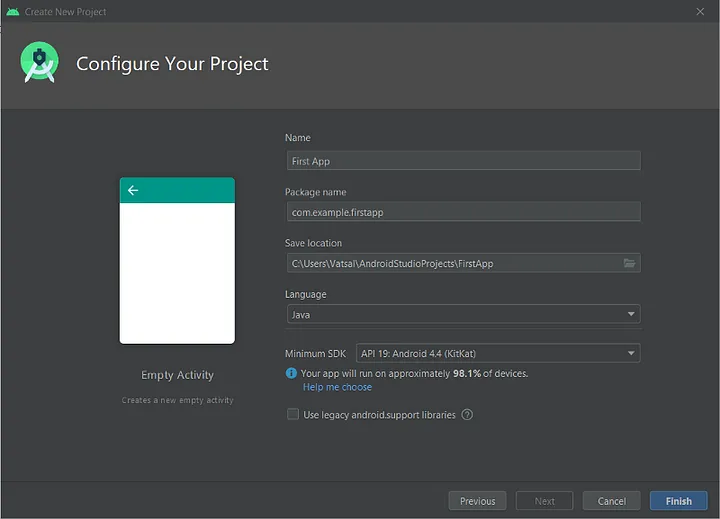
5. Configure additional project settings, such as the package name, language, and layout.
6. Click “Finish” to create the project.
After creating the project, Android Studio will generate the basic files and folders for your app, including the manifest file, layout files, and Java classes. You can then start customizing your app by adding features, modifying the layout, and testing on a device or emulator.
Design your App’s User Interface (UI)
To design the User Interface (UI) for your Android app in Android Studio, follow these steps:
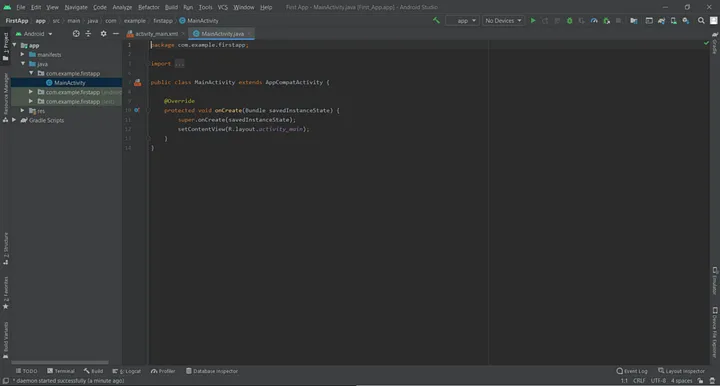
1. Open the layout file: The layout file for your main activity should be created automatically when you create a new project. To open the layout file, click on the “res” folder in the project pane and then click on the “layout” folder. Open the layout file with the name “activity_main.xml”.
2. Choose a layout: You can choose from a variety of pre-defined layouts such as LinearLayout, RelativeLayout, FrameLayout, etc. To choose a layout, click on the “Design” tab at the bottom of the layout file and then click on the “Palette” tab on the left side of the window.
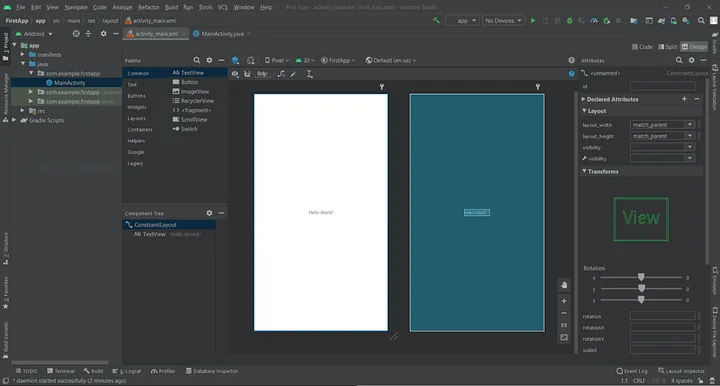
3. Drag and drop widgets: From the “Palette”, you can drag and drop widgets such as buttons, text fields, and images onto the layout canvas. You can then customize the properties of these widgets, such as their text, color, and size, in the “Properties” pane on the right side of the window.
4. Preview your layout: You can preview your layout by clicking on the “Preview” tab at the bottom of the window. This will show you how your layout will look on different screen sizes and orientations.
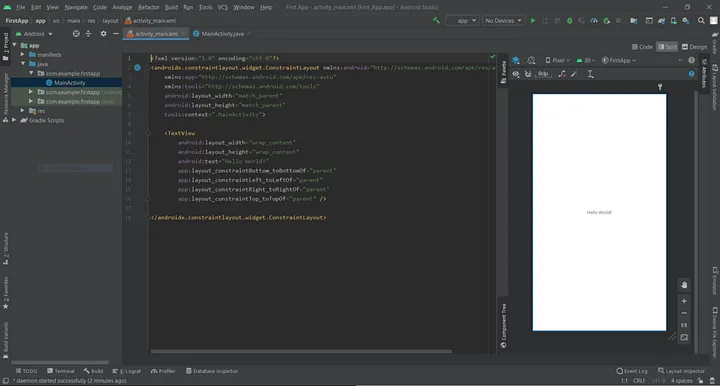
5. Edit the layout XML: If you prefer to edit the layout XML directly, you can switch to the “Text” tab at the bottom of the layout file. This will allow you to edit the XML code directly, which can be useful for more complex layouts.
As you advance in the development process, coding the UI components will be quicker and provide you with more control.
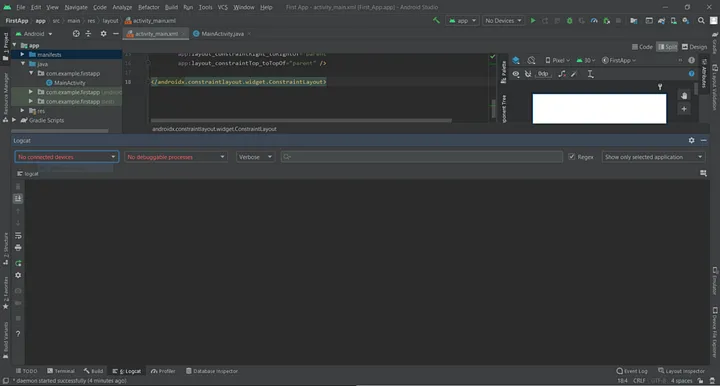
A window called Logcat is opened from the Bottom bar, as seen in this image. Because it displays all reports of your app when it is operating on a device or emulator, it is a crucial tool for app development. Discovering the cause of app crashes, which will happen frequently while being developed, is particularly helpful.
You can access this window by clicking the No Devices option in the Topbar, then AVD Manager (Android Virtual Manager). To try the program, you can install a virtual emulator from here.
Let’s Start Coding Your App
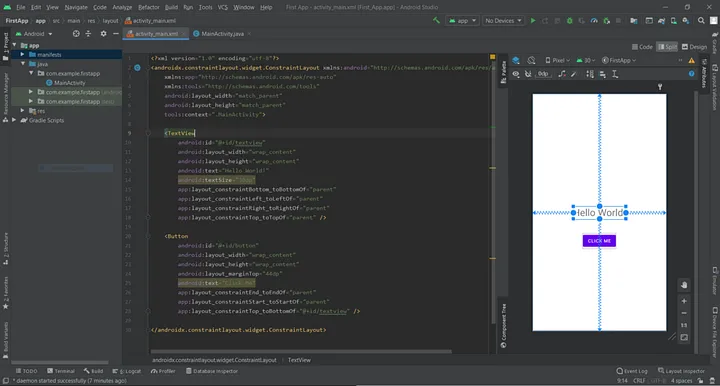
Now, enough of the introduction. Let’s get started building the app as described above. We’ll add a button to the layout and place constraints around it on the sides so that it stays in a fixed position. Also, we would enlarge the text in the existing text view. We will now give the text view and button an ID. Every UI element needs it since it offers them a unique identity to refer to in code and helps them stand out from one another when developing.
You can use the code mentioned below for testing purposes:
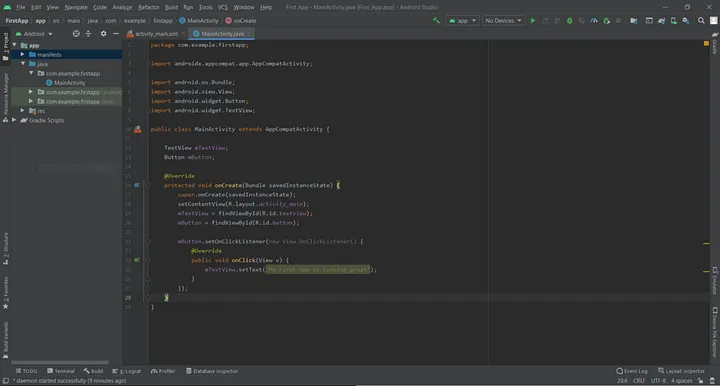
Let’s add the necessary code to make those elements effective after setting up the UI portion. The elements we wish to program are mTextView, an instance of Textview, and mButton, as indicated in the image. We will first construct a variable as an instance of each of these items.
|
1 2 3 |
TextView mTextView; Button mButton; |
Now we need to link them to the ID we provided before so that they may connect to their UI component using the “findViewById()” function, which identifies a particular view (or element) by the provided id.
|
1 2 3 |
mTextView = findViewById(R.id.textview); mButton = findViewById(R.id.button); |
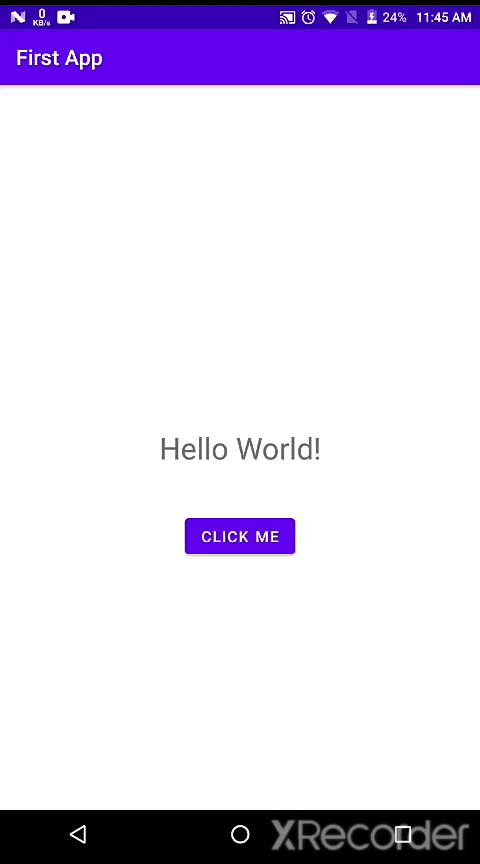
When a button is clicked, we want the text of the text view to change to read, “My First App is running nicely.” We must therefore add “OnClickListener()” to the button in order to listen to button clicks.
|
1 2 3 4 5 6 7 8 9 10 11 |
mButton.setOnClickListener(new View.OnClickListener() { @Override public void onClick(View v) { //write your code here } }); |
When a button is clicked, the code in the block will run. We selected the view’s “setText()” property because we wanted to update the text.
|
1 |
mTextView.setText("My First App is running great"); |
For testing, you can simply paste the code provided above.
Test & launch your app
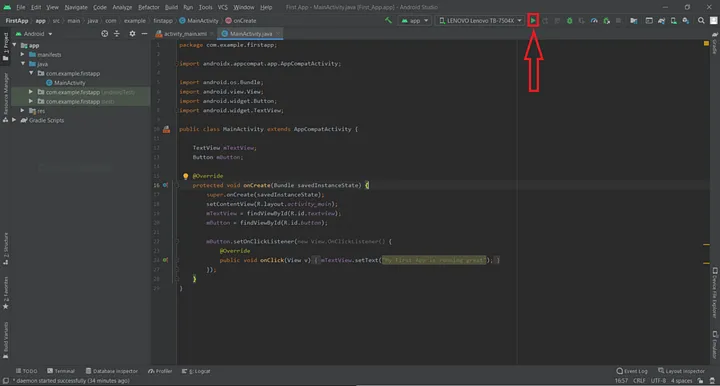
After writing your code, you should test your app to make sure it works correctly. You can use Android Studio’s built-in emulator or connect a physical Android device to your computer to test your app. You should test your app for bugs, errors, and usability issues.
If your app is ready, you can publish it to the Google Play Store. You will need to create a developer account and submit your app for review. Once approved, your app will be available for download to Android users worldwide.
Some Tips to Help You Build Your Android App Successfully
- Start small: When building your first-ever Android app, it’s best to start with a simple app with basic functionality. This will help you learn the fundamentals of Android development before moving on to more complex apps.
- Follow best practices: When writing your code, make sure to follow best practices for Android development. This includes using the appropriate design patterns, organizing your code, and optimizing performance.
- Test thoroughly: Testing is an essential part of the app development process. Make sure to test your app thoroughly to ensure that it works correctly and meets the user’s expectations.
- Seek help when needed: Android development can be challenging, and it’s okay to ask for help when you need it. There are many online resources available, such as forums and communities, where you can ask questions and get help from experienced developers.
Wrapping Up
This roadmap provides a basic guide for developing Android apps from scratch, but it is essential to note that there are many resources available to help you learn and improve your app development skills. Keep learning, practicing, and refining your skills, and you’ll be able to create high-quality Android apps that users will love.
Also read:- The importance of securing HTTPS with certificate pinning Android.


Leave a Comment
Your email address will not be published. Required fields are marked *