


Recently, I’ve spent some time observing the directions in which UI design is heading. I’ve stumbled across a few very creative, promising, and inspiring trends that, in my opinion, will shape UI design in the nearest future.
Last year, more than 5,183 breach cases were recorded which signified the loss of 7.9 Bn user data records. Android and iOS patches were introduced to deal with around 440 different types of security issues. It was unveiled that hackers attack every 39 seconds in the mobile app industry.
Such numbers have made it clear that focusing on mobile app security is not merely an Android app development trend. Rather, it has become a essential element of the development process. This has further made it imperative for business leaders and developers to look for the best security techniques and tools while building their applications. And this way, ensure that users do not see their private and sensitive data compromised and fully enjoy your app services.
One such technique that has come up as a proven way to deal with a data breach in Android apps is Fingerprint Authentication. Something we will be discussing in detail in this article.
So, let’s begin with a simple definition of what exactly it is.
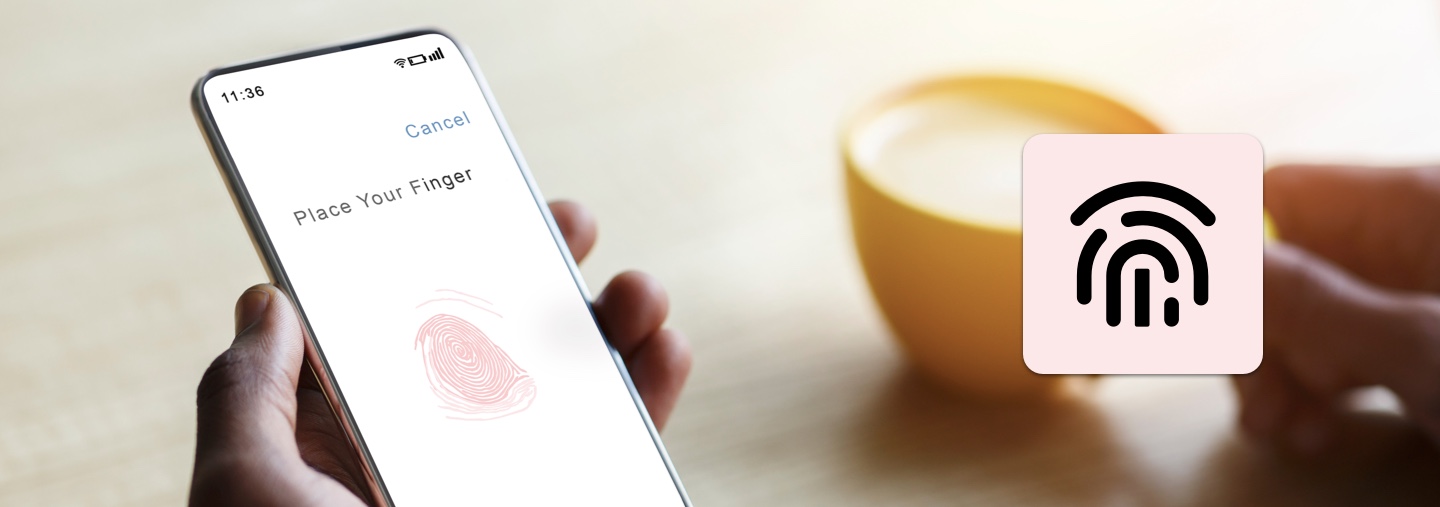
Fingerprint Authentication
Fingerprint Authentication, in simpler terms, is a technique of verifying and validating a user’s identity depending on one or more of their fingerprints. This form of biometric technology has already been considered in the area of criminal justice, border protection, financial services, and digital identity. However, its role in the mobile app development industry is quite new yet effective.
It is considered by the Android app development companies to introduce various functionalities and benefits in the environment, a few of which we will cover in the next section of the article.
Benefits of Adding Fingerprint Authentication in Your App
- The foremost advantage of considering fingerprint authentication for security reasons is that human fingerprints are unique. They are not the same even in the case of twins, which implies that no two people can use the same fingerprint for mobile app security.
- One of the biggest challenges associated with a password and other traditional verification practices is that users often lose or forget them. However, it is not possible in the case of fingerprint authentication, which eases the process of identity verification.
- Unlike voice, face, or other biometric factors, we have ten different fingerprints to employ. This implies that hackers need to experiment nearly ten times to guess the right security key within limited chances offered, which further indicates higher security.
- Lastly, using fingerprints for identity validation is quite easy and effective. A user does not need to be in a particular gesture or environment to relish the perks of fingerprint authentication.
Because of such benefits, not only development teams are showing an interest in the fingerprint authentication process, business leaders are also considering it as an imperative factor in the process to hire android app developers. Something that further indicates that it is a must for every developer to be familiar with the process to integrate fingerprint authentication in android application development.
So, let’s wrap up this article covering the same.
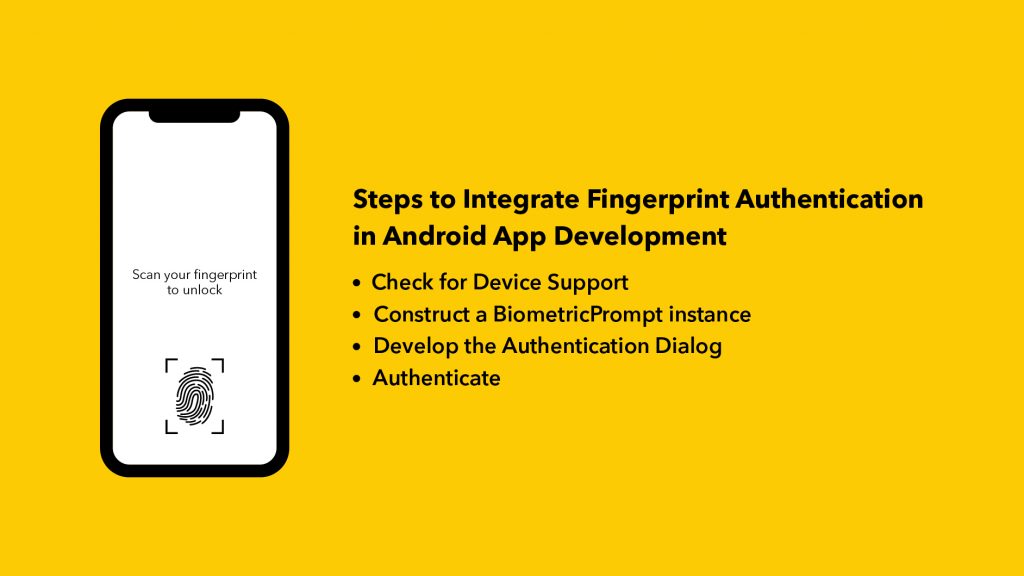
Check for Device Support
Before investing your efforts and time into the fingerprint authentication integration process, it is profitable to confirm if the devices used by your target base will be supporting the feature or not.
So, to ensure that, make a list of devices you are targeting and bring one to your environment. On doing so, call –
BiometricManager.from(context).canAuthenticate()
This will result in display of an int value on the screen, which can be –
public static final int BIOMETRIC_ERROR_HW_UNAVAILABLE = 1;
public static final int BIOMETRIC_ERROR_NONE_ENROLLED = 11;
public static final int BIOMETRIC_ERROR_NO_HARDWARE = 12;
public static final int BIOMETRIC_SUCCESS = 0;
Now, if the value for the desired devices is 1, then only proceed for the further process.
Construct a BiometricPrompt instance
To encourage your users to use the fingerprint authentication option over other available ones, it is profitable to create a BiometricPrompt instance.
Now, when focusing on the same, it is required to consider three-parameter while building constructor –
- Fragment or FragmentActivity – This will be a reference to the client’s activity.
- Executor – This parameter deals with the callback events.
- BiometricPrompt.AuthenticationCallback – This is an object that focuses on receiving authentication events.
Here, the first two parameters are somewhat direct, while the third one demands more attention.
For the first argument, you can use the calling FragmentActivity or Fragment. Likewise, for the second one, you can employ the executor that suits your needs. For making this far simple, we will be using main executor.
But, when it comes to the third parameter, it will receive the authentication results and offer android app development companies a CryptoObject related to the authentication. A simple example corresponding to this is –
val biometricPrompt = BiometricPrompt
(
this, // assuming it’s being called inside an Activity
mainExecutor,
Callback
)
For the callback, we can rely upon this command line –
val callback = object : BiometricPrompt.AuthenticationCallback()
override fun onAuthenticationSucceeded(
result: BiometricPrompt.AuthenticationResult
)
{
// user authenticated
// now you can allow him to perform that sensible action
someSensibleAction()
}
override fun onAuthenticationError(
errorCode: Int,
errString: CharSequence
) {
// called when an unrecoverable error has been encountered
// and the operation is complete
// example: user clicked the negative button or
// tried too many times and is locked up
}
override fun onAuthenticationFailed() {
// called when biometric was valid but not recognized
// example: the user tried to authenticate
// with a finger that isn’t registered
}
}
When you enter this code, the dialog box displays the message (errString) automatically. However, in the case of any error, you have to redirect users to some other flow. Also, it is required for all the Android app development companies to keep into consideration that when users tap on the negative button, it leads to an authentication error with ERROR_NEGATIVE_BUTTON.
Develop the Authentication Dialog
Using BiometricPrompt.PromptInfo.Builder, you can create an authentication dialogue button –
val promptInfo = BiometricPrompt.PromptInfo.Builder()
.setTitle(“Title”)
.setNegativeButtonText(“Negative Button Text”)
.build()
Authenticate
When all the aforementioned steps are followed religiously, you will receive two objects. Using the, you can call biometricPrompt.authenticate(promptInfo) and execute the actual authentication. This will display the authentication dialog and send the events to the specified callback.
With this, we have covered why and how to introduce the functionality of fingerprint authentication into your mobile app. Hope you find this information useful!


![AI-Leading Mobile App Companies in the USA in 2026 [Top Picks]](https://dianapps.com/blog/wp-content/uploads/2026/06/How-to-Integrate-Salesforce-with-Heroku_-A-Complete-Guide-for-Scalable-App-Development-4-768x432.png)


Leave a Comment
Your email address will not be published. Required fields are marked *