If you are someone who enjoys tracking time for every activity you partake in regularly, then a Timer app is the one thing you need!
It not only manages your valuable time but also lets you stay productive. But, what will it be like to create a timer app? It may help you and your mates to stay on track and also impact a larger community to do things on time.
Willing to give it a shot? Consider this blog a JACKPOT! This is your guide to learning insights on timer apps while also enabling you to create your own using React Native– A popular open-source framework that helps in developing fully functional mobile applications without giving extra thought to grasp upon JavaScript, HTML, CSS, and the mobile app development toolkit itself.
An overview of the concept will be enough to roll down in the cape of building a timer app with React Native app development services. Continue reading here, why use React Native for mobile app development? To understand more than just the basics of the framework.
Although, if you’re already familiar with the know-how of the framework, you can directly skip to the tutorial.
Let’s begin by gathering a few basic knowledge of timer apps, following with the prerequisites for the project.
Time to Start Developing the Timer App
A timer app is an application that measures and display time intervals or countdowns. It allows users to set specific durations and receive notifications when the timer reaches zero. The use of Timer apps comprises of cooking, workouts, productivity management, meditation, and every other time-tracking activity.
The functionality of a timer app typically involves the following components:
1. Timer Interface:
The app provides a user-friendly interface where users can set the desired time duration and start or pause the timer.
2. Countdown Mechanism:
The app utilizes a timer mechanism that counts down the time from the set duration to zero. It keeps track of the elapsed time and updates the display accordingly.
3. Notifications and Alerts:
Timer apps often provide notifications or alerts when the timer reaches zero. These can be visual alerts, sounds, vibrations, or a combination of these options.
4. Background Functionality:
Timer apps may offer the ability to run in the background, allowing users to switch to other apps or lock their devices while the timer is still active. This ensures that users can receive notifications even if they are not actively using the app.
6 Popular Examples of Timer Apps
Some popular examples of timer apps include:
Image source: https://myhours.com/best-time-tracking-apps
![]()
1. MyHours: Best for ease of use
![]()
My Hours, which has almost 20 years of expertise, was created with the sole purpose of time monitoring so that you may manage profitable projects. The tool excels at basic time monitoring for employees (timesheet or real-time tracker) and sophisticated but understandable reporting.
2. Timely: Best for visual tasks and project planning
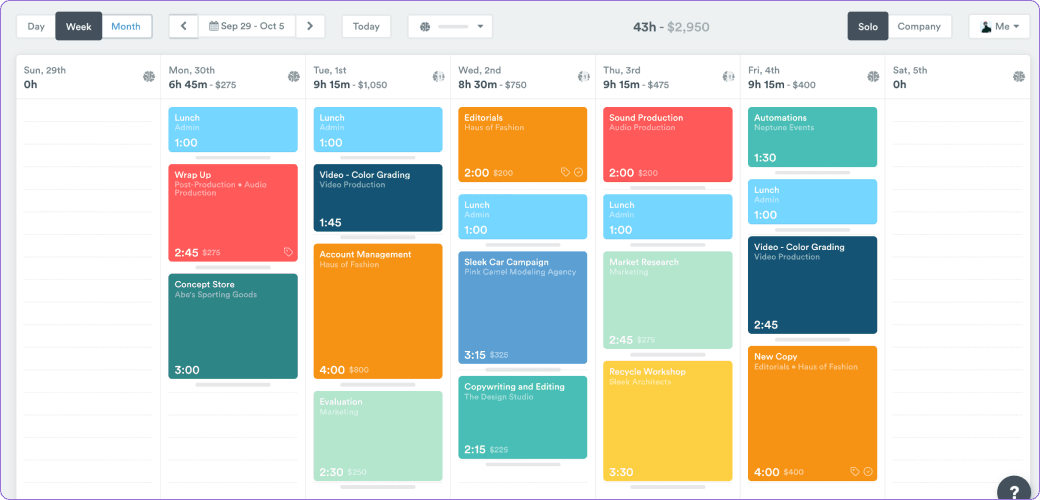
The time tracker called Timely gets the closest to automatically recording how much time your employees spend working. You may use the AI-powered mobile app development to fill in the blanks on your timesheet while it also picks up new information.
3. Scoro: Best for professional services
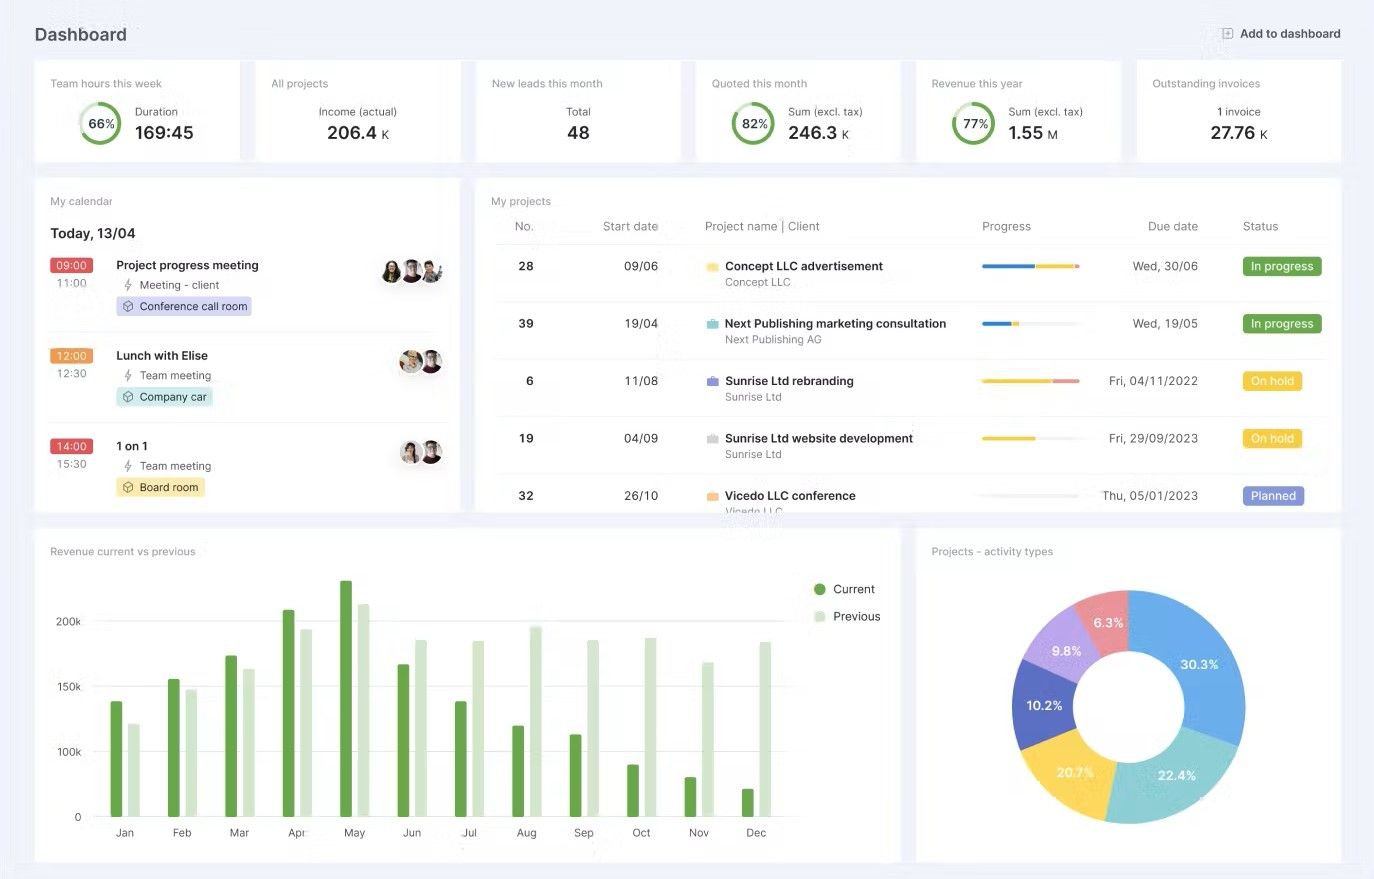
Scoro describes itself as the primary hub for your business, where you can successfully manage and cooperate with your team while managing every part of it. It’s a feature-rich app with all the resources you need to successfully manage a business service.
4. Harvest: Best for invoicing time and materials
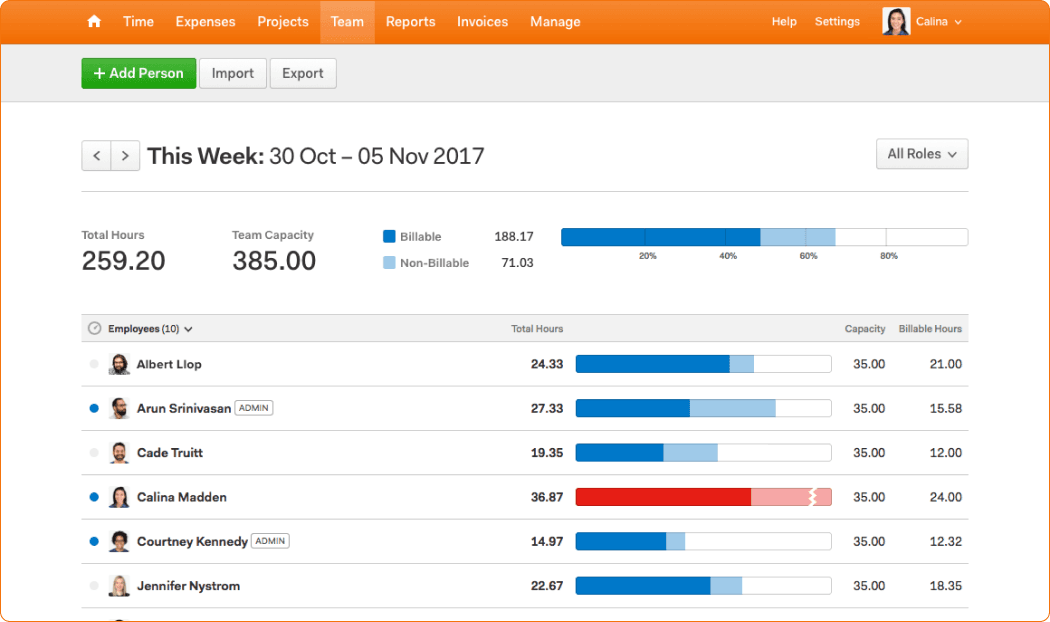
The majority of “serious” time trackers can find everything they need with the Harvest app. It offers a comprehensive journey from time monitoring to billing in a way that will work for the majority of freelancers and organizations. Harvest is a fantastic choice if you’re seeking for a time tracker with invoicing and accounting functions that are similar to those found in basic accounting software.
5. QuickBooks Time: Best with integrating with QuickBooks
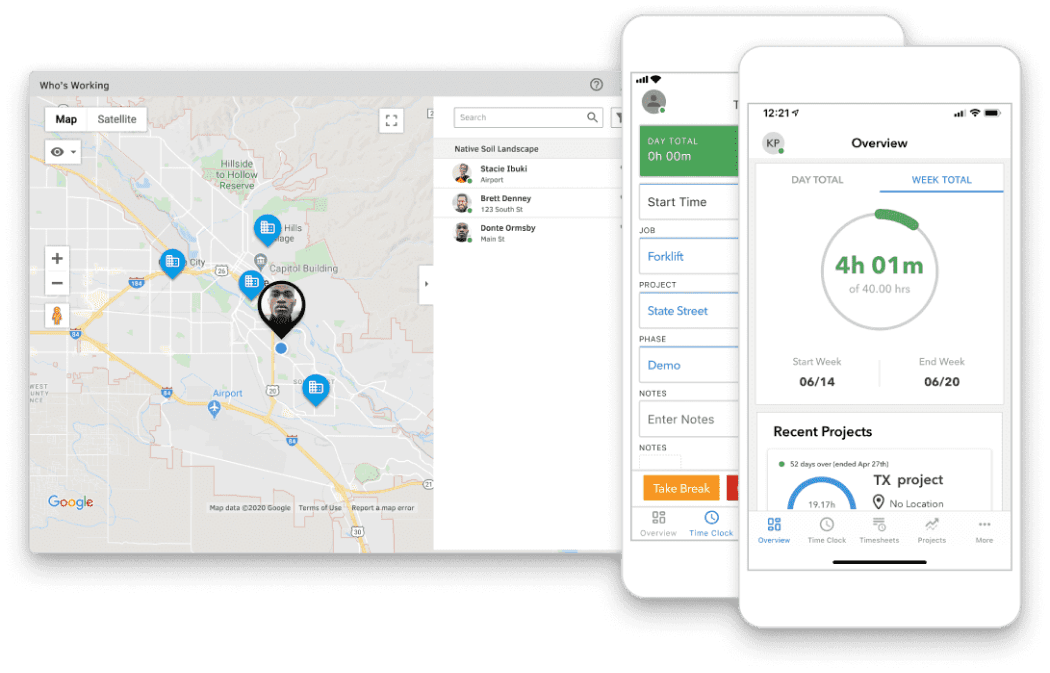
The key factor in choosing QuickBooks Time (formerly TSheets) as a time tracker is that it is a member of the QuickBooks family. QuickBooks Time covers all the essential time-tracking functions properly. Most likely, your accounting department already uses QuickBooks, and QuickBooks Time interacts seamlessly with it.
6. Replicon: Best for complicated setups and enterprises
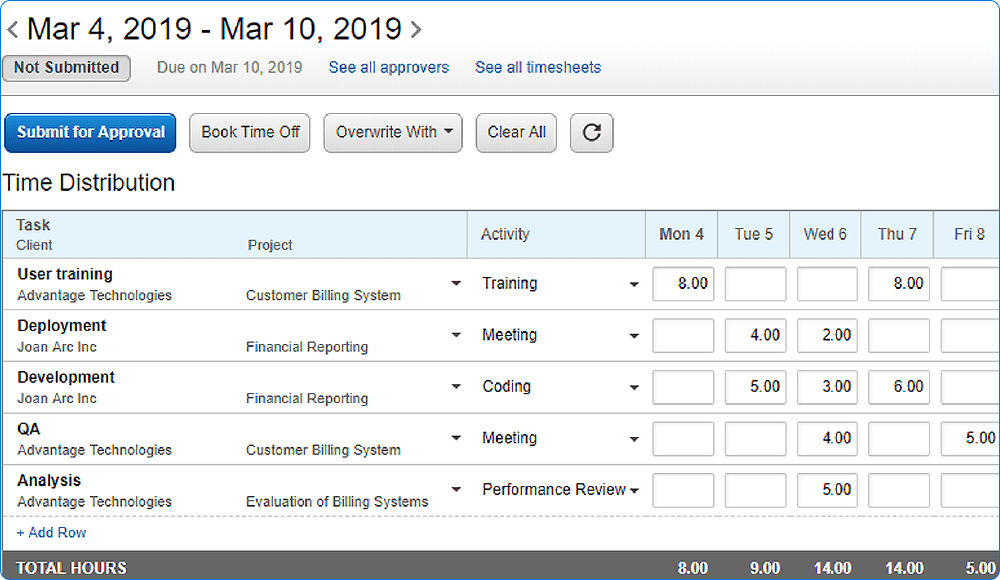
Replicon is a considerably more business-oriented time-monitoring tool than the other options on this list. Overall, it serves as a time management tool for your time and attendance requirements. Additionally, it excels at managing expenses, resources, and absences.
Why is React Native Suitable for Timer App Development?
React Native app development, a popular framework for building mobile applications has gained popularity for timer apps due for several reasons:
1. Cross-platform Development:
React Native allows developers to write code once and deploy it across multiple platforms like iOS and Android. This saves development time and effort, making it an efficient choice for timer apps that need to target a wide user base.
2. Native Performance:
React Native app development services enable developers to build apps with native-like performance. Since timers require accurate and precise timing, React Native’s ability to access native APIs and components ensures that timers work smoothly and reliably.
[Read: Cross-platform vs Native mobile app development.]
3. Developer Productivity:
React Native offers a vast ecosystem of pre-built components, libraries, and tools. This ecosystem accelerates development, as developers can leverage existing resources to implement timer functionalities quickly and efficiently.
4. Real-time Updates:
React Native’s reactive architecture allows for real-time updates and smooth UI interactions. This is beneficial for timer apps as they require frequent updates to display the elapsed time and interact with user input effectively.
With this, we have collected all the valuable insights on timer apps and taken our expert’s guidance in React Native app development services. It’s time to get started with the prerequisites.
What are the Prerequisites for Building a Timer App in React Native?
You must perform prerequisite tasks that are frequently carried out by a professional React Native app developer before organizing the codebase. Here they are.
However, before starting, if you are willing to know the steps to choose a React Native app development company, here’s the guide you need to follow.
React Native Environment Setup.
You can use either the React Native CLI or the Expo CLI to develop React Native for your projects. The React Native CLI will be employed for the current project. Therefore, if you’re doing the same, you must first create the environment.
Users of Windows should utilize this setup. The setup of the React Native environment may differ for Mac users. Install git on your development system to continue the configuration process. You must thus install the following applications to complete the task.
- NPM Package Manager
- Node.js
- React Native CLI. This CLI has to be installed globally using NPM.
- Android Studio. Install the Android SDK, configure the software, and set up the virtual device for your upcoming projects.
- An IDE or code editor like Visual Studio Code.
Create a Local Folder
To keep your codebase organized, you need a folder. Here is the step that is described below.
- Make a folder on your computer.
- From this folder, launch cmd.
- Press the Enter key after running the command npx react-native init Timer –version 0.71.3.
- The project we’ll be making is called The Timer, and the version of React Native we’ll be using to construct it is 0.71.3.
Read the latest version of React Native 0.73.
We will install the third-party library in the following step as we have already created a local folder for the project.
Install the Necessary Third-Party Library
We need a react-native-stopwatch-timer for this project. React Native’s support for third-party libraries is one of the best benefits of using the open-source JS framework to create an app. So, we’ll use the Timer component from this package in this instance.
This library can be used to add stopwatch and timer features. Reset, lap, and start/stop buttons are additional functions that can be added and customized. It provides a simple API for developing timer applications and is built on top of React Native app development.
Open the Timer folder’s terminal window and type npm install react-native-stopwatch-timer to install this package.
The project’s package-lock.json folder is where you may find the library.
Steps to Build A Timer App With React Native
Step 1: Creating a Project Codebase
We shall now begin with the codebase. To organise project code, open the App.js folder in the Timer folder of the installed IDE (We’re thinking of VS Code).
Follow the instructions provided in the code snippet.
A. Importing Components
|
1 2 3 4 5 6 7 |
import React, {useState} from 'react'; import {SafeAreaView, StyleSheet, Text, View, TouchableHighlight} from 'react-native'; import {Timer} from 'react-native-stopwatch-timer'; |
React, useState, StyleSheet, View, Text, SafeAreaView, and TouchableHighlight are all imported in this section of the code, as well as Timer from the react-native-stopwatch-timer package.
useState is used to define states and manage states. Layout and rendering are handled by the typical React Native components TouchableHighlight, View, Text, and StyleSheet.
B. Defining Different States of the App
|
1 2 3 4 5 6 7 8 9 10 11 |
const App = () => { const [isTimerStart, setIsTimerStart] = useState(false); const [timerDuration, setTimerDuration] = useState(90000); const [resetTimer, setResetTimer] = useState(false); |
With the use of the keyword const, the code introduces the useful component App. The App also defines the states isTimerStart, timerDuration, and resetTimer using the React Native hook useState.
The isTimerStart property’s initial value is “false.” It shows whether the timer is running. TimerDuration is initially set to 90000. The overall millisecond duration of the timer is indicated by TimerDuration.
The resetTimer’s initial value is also maintained as “false.” If the timer is reset, it is specified.
Each state variable’s most recent value is returned as an array by the useState function, which takes a parameter. The state of each state variable is updated using a function that uses the keyword “set” before the variable’s name.
C. Introducing an Object with Two Properties: Text & Container
|
1 2 3 4 5 6 7 8 9 10 11 12 13 14 15 16 17 18 19 20 21 22 23 24 25 26 27 |
const options = { container: { backgroundColor: '#566573', padding: 5, borderRadius: 5, width: 200, alignItems: 'center', }, text: { fontSize: 25, color: '#fff', marginLeft: 7, }, }; |
The defines an object called “options” with the attributes text and container. It employs a particular backgroundColor, padding, borderRadius, width, and alignItems for the container. In contrast, the text has a left margin of 7 pixels, a fontSize of 25, and a colour of white.
D. Creating the Layout using ‘View’ and ‘SafeAreaView’
|
1 2 3 4 5 6 7 8 9 10 11 12 13 14 15 16 17 18 19 20 21 22 23 24 25 |
<View style={styles.sectionStyle}> <Timer totalDuration={timerDuration} msecs start={isTimerStart} reset={resetTimer} options={options} handleFinish={() => { alert('Completion Function'); }} getTime={(time) => { console.log(time); }} /> |
The code snippet makes use of both the Timer and View components, with the latter being utilised to create a container for the former. The layout of the container is designed using the object sectionStyle.
The Timer includes several different properties, including getTime, handleFinish, options, and handleFinish. We use this functionality to alter the timer’s behaviour.
The timer’s duration is shown in milliseconds through the totalDuration property. The timing unit in which the timer will function is indicated by the’msecs’. Reset the timer using the reset button. The timer’s visual look can be altered.
When the timer has finished counting, the handleFinish function is called. ‘Complete Function’ will be the warning message that appears.
When the timer updates the display, the getTime method is invoked. Log the current timing to the console using console.log().
E. Rendering TouchableHighlight Components and Updating the State
|
1 2 3 4 5 6 7 8 9 10 11 12 13 14 15 16 17 18 19 20 21 22 23 24 25 26 27 28 29 30 31 32 33 34 35 36 37 38 39 40 41 |
<TouchableHighlight onPress={() => { setIsTimerStart(!isTimerStart); setResetTimer(false); }}> <Text style={styles.buttonText}> {!isTimerStart ? 'START' : 'STOP'} </Text> </TouchableHighlight> <TouchableHighlight onPress={() => { setIsTimerStart(false); setResetTimer(true); }}> <Text style={styles.buttonText}>RESET</Text> </TouchableHighlight> </View> </View> </SafeAreaView> ); }; |
There are two TouchableHighlight components used in the code snippet. Each TouchableHighlight component is coupled with a single onPress event handler.
Click the first TouchableHigllight, the code performs an arrow function. In order to update the state of the variable, it then calls setResetTimer and setIsTimerStart. Use the update of isTimerState variable’s state in setIsTimerStart function. The usage of the exclamation point (!) negates the value of isTimerStart as it now stands. On the other hand, resetTimer’s value is specified using the setResetTimer method.
The button’s text is added using the Text component. Depending on the value of the isTimerState variable, the same button will display “START” or “STOP.”
The second TouchableHighlight component makes use of an additional onPress event handler. When users click the button, the event handler is triggered.
Here, the setIsTimerStart and setResetTimer properties are set using the onPress event. The timer will be stopped by this action and reset to its starting value. The button now has the text ‘RESET’ added to it using styling object styles.buttonText.
F. Structuring the Styling Section for the Project
|
1 2 3 4 5 6 7 8 9 10 11 12 13 14 15 16 17 18 19 20 21 22 23 24 25 26 27 28 29 30 31 32 33 34 35 36 37 38 39 40 41 42 43 44 45 46 47 48 49 |
export default App; const styles = StyleSheet.create({ container: { flex: 1, padding: 10, justifyContent: 'center', alignItems: 'center', }, title: { textAlign: 'center', fontSize: 20, fontWeight: 'bold', padding: 20, }, sectionStyle: { flex: 1, marginTop: 32, alignItems: 'center', justifyContent: 'center', }, buttonText: { fontSize: 20, marginTop: 10, }, }); |
It is the project’s CSS component. As you can see, it has four styling elements applied to it: container, title, sectionStyle, and buttonText.
Step 2: Test the Timer Functionality
- Interact with the app by tapping the “Start,” “Pause,” and “Reset” buttons to control the timer.
- The timer should start counting up when you tap “Start,” pause when you tap “Pause,” and reset to zero when you tap “Reset.”
Step 3: Execute the Codebase
Once you create the codebase, determine whether it is operating or not. So, take a look at the next few steps to verify this.
From the project folder, launch the terminal.
On the terminal, type npm install followed by npx react-native run-android.
Use a virtual device or emulator to run the project after waiting for it to bundle.
Congratulations! You have built a ground-level timer app with the help of a React Native app development company. You can further enhance the app by adding additional features, styling, or incorporating other functionalities as per your requirements.
DianApps has experience in building React Native apps in just 10 days. Have a look at the blog first to brainstorm your mind.
Wrapping Up
We anticipate that you are now familiar with the procedures of creating a Timer app.
It’s simple to create a timer app using React Native app development services. To start with the process you only need a fundamental understanding of the framework. If you’ve never used the framework before, start with understanding the prerequisites mentioned in this blog post. Run the application on a real or virtual device once the coding and finish the overall project styling.
For building an explicit timer app, you do need assistance from a React Native app development company. DianApps hold the experience in developing futuristic apps irrespective of the domain of your expertise. So, whether you are a Startup looking for a good choice in the framework or a Fortune 500 company that is willing to switch to a new development platform, we have solutions for all!
Why is React Native a good choice for startups? Continue reading to find out!
Get in touch with our React Native consultants today for a more premium understanding of the Timer app and how can we help in building one for you!




Leave a Comment
Your email address will not be published. Required fields are marked *