If you ask us which element is the core of building a React Native application, we would say–Setting up the development environment.
Just like traditional business, finding a location and constructing the building is the base to accelerate the operation of your business. Setting the development environment works just the same way.
React Native app development framework is said to be evergreen as it implies everything that is required to build a full-fledged application. And to prove this statement, this blog post has a lot to offer.
React Native development services in Australia are the most dependable country for this framework. According to statistics, the use of the React Native framework in Australia is approximately 805 which will reflect higher in the coming years.
Let’s understand the need for an environment setup first!
Why do we need a Development Environment?
Before deploying our applications, we need to construct and edit them locally in a development environment. This gives programmers a significant degree of freedom and flexibility.
Simply said, a development environment is a work area where we do development. A development environment is often said to be a number of tools and services that help us create the code or write the code for the application we want.
This help takes many different forms and often includes everything we would want while writing code for your React Native development services in Australia projects.
- The majority of development environments provide built-in debugging and patching capabilities.
- They frequently help with activities related to maintaining and updating our codes.
- Integrated Development Environments, or IDEs, provide us with a synchronized interface to inspect our programs as we build them. This is how we typically work nowadays.
- For developers, the entire development process—writing, testing, and packaging—is greatly simplified.
Development environments can be toolkit environments (which support various programming languages) or single-language-oriented environments. Given that React Native is a framework that supports several different languages, it should come as no surprise that we choose toolkit environments for our React Native app development services.
Let’s start setting up your React Native app now!
React Native Development Environment Setup
When developing for React Native, we often utilize the Expo CLI or React Native CLI in conjunction with Android Studio or XCode. You are free to utilize either for your project, but if you’re unsure which is best for you, this blog may be able to help.
Snack
Snack is a browser-based programming environment for React Native programming, or as its creators prefer to refer to it, a playground. That’s true, you don’t need to set up any IDEs, customize them, install CLIs, or start out totally committed to React Native. Start developing your React Native project by going to the Snack browser environment.
You heard it right, you don’t need to set up any IDEs, customize them, install CLIs, or start out totally committed to React Native. You may easily start developing your React Native project by going to the Snack browser environment. It is ideal for both novices and senior citizens who wish to experiment a bit. You can easily develop, test, and package your codes thanks to it.
But we’re here on a more serious adventure. We’ll talk about how to set up a React Native development environment on your machine. There are two options, one of which is simpler. Let’s investigate them!
Expo Go
This is the simple route.
If you are new to mobile programming, you should choose Expo Go for setting up a React Native development environment for creating mobile user interfaces. As we shall see in a moment, setting up Expo Go is pretty simple. A number of helpful features on React Native come along with Expo Go. An emulator and the most recent version of Node.js are all that are required to set up Expo Go.
Let’s make a “MyfirstProject” React Native project in Expo Go!
You can quickly launch a development server if you’re using npm by:
|
1 2 3 4 5 6 7 8 9 |
npx create-expo-app MyfirstProject cd MyfirstProject npm start # you can also use: npx expo start |
To implement it in a similar development server in yarn use the following code set up:
|
1 2 3 4 5 6 7 |
cd MyfirstProject yarn start # you can also use: yarn expo start |
Problems with Expo Go
Expo Go makes it simple to begin working on a new React Native project, but it comes with a number of limitations that will ultimately limit your ability to code in React Native app development.
It forbids the use of native codes.
- In Expo Go, integrating APIs in React Native devices for efficient Android and iOS APIs is not available.
- Not always appropriate if you want to create minimal apps.
- Your free constructions may occasionally become queued in Expo Go.
In light of this, it would be great to learn how to set up React Native development services in Australia with the environment in your system using the React Native CLI. So let’s do it.
React Native CLI
Compared to Expo, setting up React Native CLI is just slightly more difficult because it needs XCode or Android Studio. If you have experience with mobile programming, setting up and using React Native CLI should be a breeze for you. If you are a novice and do not already have XCode or Android Studio installed, it would take some time to install and set up either of the IDEs. It might be a little overwhelming at first, particularly if you’re just getting started.
However, do not worry!
This comprehensive guide will show you how to configure your project in React Native CLI. As we will be building up a development environment for a project targeted at Android OS, we will be using Android Studio for these examples.
It’s crucial to remember that the setup procedures vary slightly depending on the Development OS. We will discuss the procedures for Windows, macOS, and Linux in this blog.
Development Environment with React Native CLI on macOS
Prerequisites:
You would also need Node.js, Watchman, JDK, and Android Studio installed on macOS in addition to React Native CLI. Facebook created Watchman, a program that only “watches” changes to your filesystems. This utility is suggested since it significantly improves the React Native app performance of your code. Using Homebrew, you may install both Watchman and Node. Install Node 14 or above, if possible. Enter the following in a Terminal to install Watchman and Node using Homebrew:
|
1 2 3 4 5 |
brew installnode brew install watchman |
You need JDK 11 or later in order to function with React Native. Once more using Homebrew, install the OpenJDK package Azul Zulu to install your JDK by running the following commands:
|
1 2 3 |
brew tap homebrew/cask-versions brew install --cask zulu11 |
Setting up the Development Environment
We can now set up the Android Development Environment as we have all the tools required to build up our development environment. Before setting up the development environment, Android Studio must first be installed and configured, just as on Windows. To make the stages simpler to follow, let’s go over them one at a time.
1. Install Android Studio
The following boxes must be ticked in the installation wizard during the download and installation of Android Studio in order to install these component lifecycle:
- Android SDK
- Platform for Android SDK
- Android Virtual Device
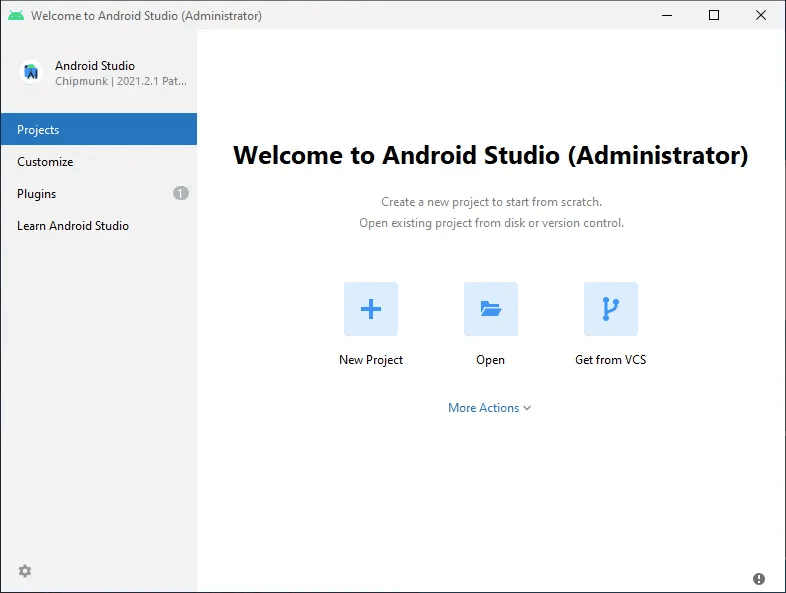
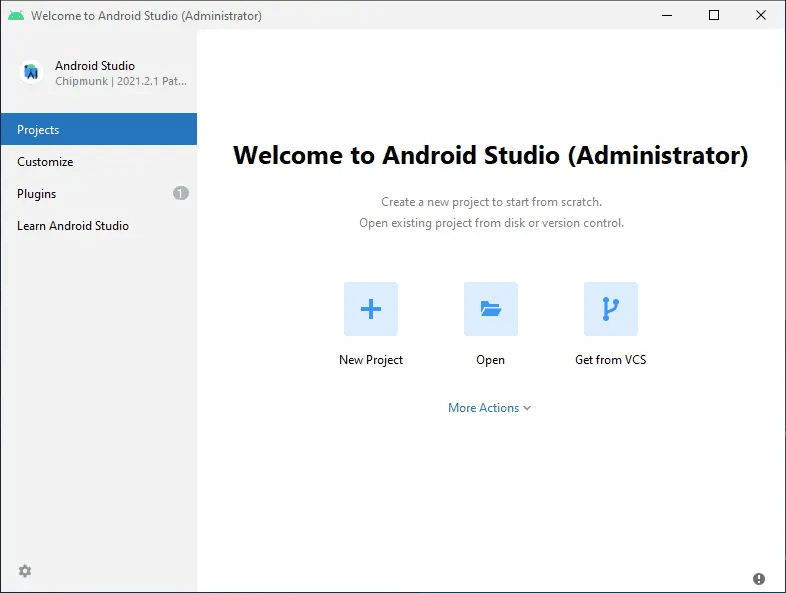
Complete the setting so that the Welcome Screen will appear.
2. Download the Android SDK
The Android 12 (S) SDK is required for React Native. To set up that:
- By selecting the “More Actions” button, select the “SDK Manager” option.
- Select the “SDK Platforms” tab in SDK Manager.

- Expand the Android 12 (S) option and choose the “Show Package Details” checkbox in this tab. You must check the following boxes in this situation:
- Platform SDK for Android 31
- Google APIs/Intel x86 Atom_64 System Image x86 Atom System Image from Intel
- Chrome APIs System Image for ARM 64 v8a (just for Apple M1 Silicon)
Additionally, make sure that “Android SDK Build-tools” is set to 31.0.0 under the “SDK Tools” tab.
As soon as you click the “Apply” button on the Android Studio Welcome Screen, your Android SDK and other necessary tools will be installed.
3. Setting up ANDROID_SDK_ROOT
Similar to ANDROID_HOME, you need to insatll ANDROID_SDK_ROOT an environment variable that create native code apps.
Add the following commands to $HOME/.bash_profile or $HOME/.bashrc to do this:
|
1 2 3 4 5 |
export ANDROID_SDK_ROOT=$HOME/Library/Android/sdk export PATH=$PATH:$ANDROID_SDK_ROOT/emulator export PATH=$PATH:$ANDROID_SDK_ROOT/platform-tools |
- Next, use source $HOME/.bash_profile to load the configuration into bash.
- Or, you may use source $HOME/.zprofile to add it to the current shell.
- To make sure ANDROID_SDK_ROOT is correctly configured, you must now execute echo $ANDROID_SDK_ROOT.
- Run echo $PATH to confirm that the appropriate folders have been added to the path on your macOS machine, which is now completely set up for Android Studio.
Run React Native CLI to finish setting up your development environment by using:
npx react-native <command>
From macOS, you can now start a new React Native project with:
npx react-native init MyfirstProject
Development Environment with React Native CLI on Windows
Prerequisites
You would also require Node.js, the Java SE Development Kit (JDK), and Android Studio to be installed in addition to React Native CLI. Using the well-known Windows package manager Chocolatey, you should install an LTS version of Node.
However, it would be preferable to install Node using the Node version of Windows Manager, nvm-windows, if you need to transition between LTS and other versions of Node. Again, Chocolatey may be used to install JDK:
choco install -y nodejs-lts openjdk11
Setting up the Development Environment
Given the number of stages, setting up the development environment may seem a little challenging. Installing and configuring Android Studio is required prior to setting up the development environment. To make the stages simpler to follow, let’s go over them one at a time.
1. Install Android Studio
The following boxes must be ticked in the installation wizard during the download and installation of Android Studio in order to install these components:
- Android Virtual Device
- Performance (Intel ® HAXM)
- Android SDK
- Android SDK Platform
Complete the configuration in order to access the Welcome Screen.
2. Install the Android SDK
The Android 12 (S) SDK is required to install the Android SDK React Native. To set up, follow the below-given steps:
- By selecting the “More Actions” button, select the “SDK Manager” option.
- Select the “SDK Platforms” tab in SDK Manager.

Expand the Android 12 (S) option and choose the “Show Package Details” checkbox in this tab. You must check the following boxes in this situation:
- Platform SDK for Android 31
- Google APIs with Intel x86 Atom_64 System Image x86 Atom System Image from Intel
- Additionally, make sure that “Android SDK Build-tools” is set to 31.0.0 under the “SDK Tools” tab.
As soon as you click the “Apply” button on the Android Studio Welcome Screen, your Android SDK and other necessary tools will be installed.
3. Setting up ANDROID_HOME
An environment variable called ANDROID_HOME is required to use React Native. To set this up:
- Go to “Windows Control Panel” first.
- From there, choose “User Accounts” and then “User Accounts” once again.
- Click “Change my environment variable” to continue.
- Click “New” to establish a new user variable called ANDROID_HOME that points to your Android SDK path.

This would automatically install the SDK in the following location: %LOCALAPPDATA%\Android\Sdk
Open Powershell from a new Command Prompt window to confirm that the new environment variable has been installed correctly. Type “Get-ChildItem -Path Env:” into Powershell to see if ADROID_HOME has been inserted.
4. Adding platform tools to the Path
- First, as we did in the preceding step, navigate to “Change my environment variable” from User Accounts in the Windows Control Panel.
- Select “Edit” after clicking “Path” right now.
- After that, choose “New” to include this Path in platform tools.
- The platform-tools folder would be generated automatically at %LOCALAPPDATA%AndroidSdk.
Your Android Studio is ready. Run React Native CLI to finish setting up your development environment by using:
npx react-native <command>
So you are ready to launch your React Native development services in Australia with our environment development setup. Let’s explore setting up the environment for Linux now!
Also read the state of React Native for Web, Windows, and macOS to understand each of the device’s environment setup more efficiently.
Development Environment with React Native CLI on Linux
Prerequisites
If you’re using Linux, you’ll also need to have Node.js, Watchman, a JDK, and Android Studio installed on your machine in addition to React Native CLI. Use the installation instructions for Linux to install Node 14 or later versions of Node. You require JDK version 8 or above for your JDK. AdoptOpenJDK or your system packager can be used to install OpenJDK. If you choose, you may also decide to install Oracle JDK 14.
Setting up the Development Environment
Even though the method is quite similar to that used in Windows or macOS, setting up the development environment takes a little while. Before we set up the development environment, Android Studio must be installed and configured, just like we did before. The detailed instructions for setting up the Android Development Environment for React Native on Linux are provided here:
But before that, read along how to build steller Android apps in Linux for an insightful grasp upon creating one easily. And then come back here for more information.
1. Install Android Studio
Here are the checklists you need for the installation wizard when the download and installation of Android Studio in order to install these components:
- Android Virtual Device
- Performance (Intel ® HAXM)
- Android SDK
- Android SDK Platform
Complete the configuration in order to access the Welcome Screen.
2. Install the Android SDK
You need to install The Android 12 (S) SDK from the Android SDK React Native. To set up, follow the below-given steps:
- By selecting the “More Actions” button, select the “SDK Manager” option.
- Select the “SDK Platforms” tab in SDK Manager.
Expand the Android 12 (S) option and choose the “Show Package Details” checkbox in this tab. You must check the following boxes in this situation:
- Platform SDK for Android 31
- Google APIs with Intel x86 Atom_64 System Image x86 Atom System Image from Intel
- Additionally, make sure that “Android SDK Build-tools” is set to 31.0.0 under the “SDK Tools” tab.
As soon as you click the “Apply” button on the Android Studio Welcome Screen, your Android SDK and other necessary tools gets available. In case you face any problems, ask your hired React Native app development company to concisely look into the error.
3. Setting up ANDROID_SDK_ROOT
Similar to ANDROID_HOME, ANDROID_SDK_ROOT is an environment variable that must be set up in order to create native code apps.
Add the following commands to $HOME/.bash_profile or $HOME/.bashrc to do this:
|
1 2 3 4 5 |
export ANDROID_SDK_ROOT=$HOME/Library/Android/sdk export PATH=$PATH:$ANDROID_SDK_ROOT/emulator export PATH=$PATH:$ANDROID_SDK_ROOT/platform-tools |
- Next, use source $HOME/.bash_profile to load the configuration into bash.
- Or, you may use source $HOME/.zprofile to add it to the current shell.
- Make sure ANDROID_SDK_ROOT is set properly, and execute echo $ANDROID_SDK_ROOT in the next step.
- Run echo $PATH to confirm that the appropriate folders adds to the path on your macOS machine, which is now completely set up for Android Studio.
Once again, your Android Studio is ready to push forward, but this time on a Linux machine. Run React Native CLI to finish setting up your development environment by using:
npx react-native <command>
Add the following to start developing your first React Native development services in Australia projects in Linux:
npx react-native init MyfirstProject
Conclusion
Now that you’ve hopefully successfully installed your React Native Development Environment and even launched your first React Native Project for your business.
Run my first project is all that remains!
To execute apps, React Native leverages Metro, a JavaScript bundler that comes with it. To learn how to launch and execute your React Native apps using the Metro Bundler, refer to the Metro Docs.
Additionally, the React Native Team’s Integration Guide may be useful to you if you wish to integrate your freshly created React Native code into an already existing application. If not, feel free to reach out to a React Native app development company in Australia or return here for another in-depth discussion of these!
Until then, keep exploring all the norms of React Native for efficient and round-the-clock development experience.


Leave a Comment
Your email address will not be published. Required fields are marked *